Veeva Claims provides the ability to create Local Adaptations from a Project. Depending on your Admin’s configuration, you may have multiple options for creating Local Adaptations from a Project using a single action on a Project record:
- Create selective Local Adaptations for specified Location and Claim combinations for that Project.
- Create Local Adaptations for all Location and Claim combinations for that Project.
Depending on your Admin’s configuration, object, field, and section labels may appear differently than the labels mentioned in this article.
Selectively Creating Local Adaptations
Vault generates one (1) Local Adaptation for each specified combination of Claim and Location, provided the combination of Claim and Location does not already exist as a Local Adaptation in your Vault. This action is available only if the Project has at least one (1) Claim and one (1) Location.
Using the Generate Local Adaptations Dialog
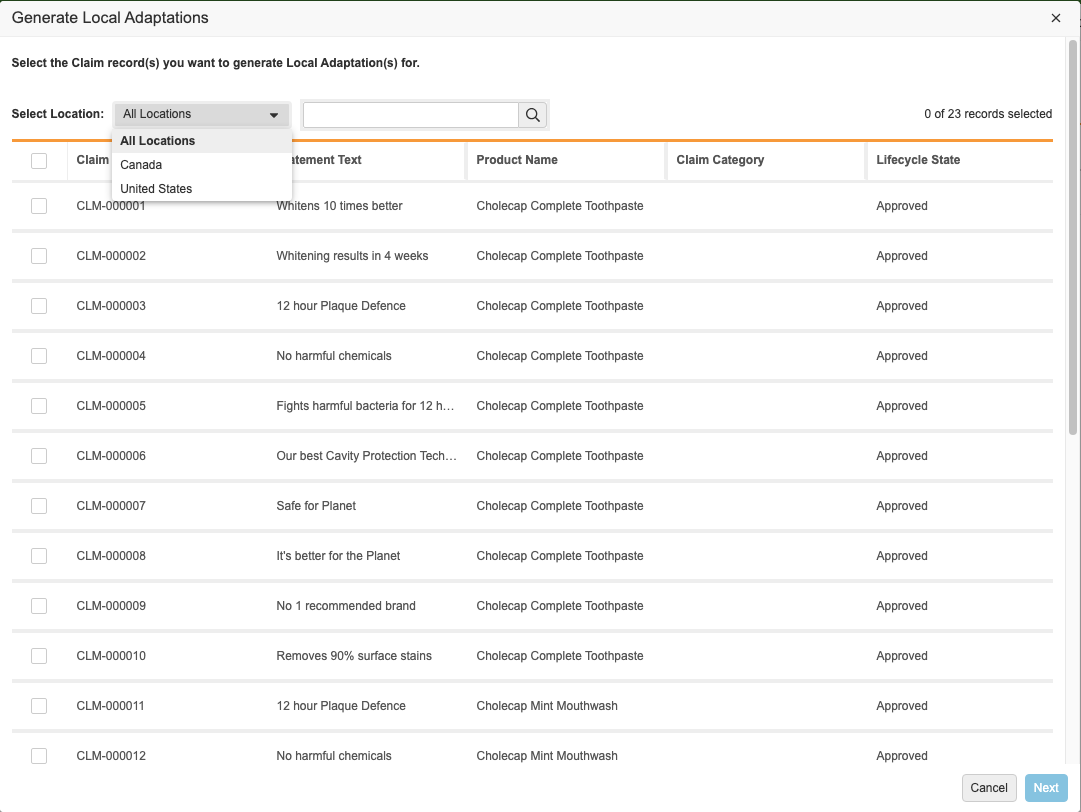
The Generate Local Adaptations dialog opens after you run the Create Selective Local Adaptations action and allows you to select which Claims to create as Local Adaptations for specified Locations. Depending on your Admin’s configuration, Claims available for selection may be limited to particular lifecycle states.
In the dialog, you can do the following:
- Select the Claims for which you want to create Local Adaptations for all Locations on the Project.
- Filter on a specific Location and then select the Claims for which you want to create Local Adaptations for that specific Location. You can repeat this process for every Location.
- Hover over cells to see the entire contents of values with more than 250 characters.
Claims you select for a specific Location remain selected when you select and view another Location. The number of records selected in the counter displays the records selected for the current Location.
The columns in the Generate Local Adaptations dialog are object fields on the Claim object and are configured by your Admin. You can use the search box to search for text values in any of the columns in the dialog except for Object and Component field types.
Note: The creation process adheres to your permissions and lets you view only the records to which you have read access.
How to Create Selective Local Adaptations
To selectively create Local Adaptations from a Project:
- Navigate to the Project from which you want to generate Local Adaptations.
- From the All Actions menu, select Create Selective Local Adaptations.
- Do one (1) of the following in the dialog:
- To create Local Adaptations for all Locations, select All Locations from the Select Location drop-down and select the appropriate Claims.
- To create Local Adaptations for specific Locations, select the Location for which you want to create Local Adaptations and then select the appropriate Claims. Repeat this step for each Location for which you want to create Local Adaptations.
- Click Next.
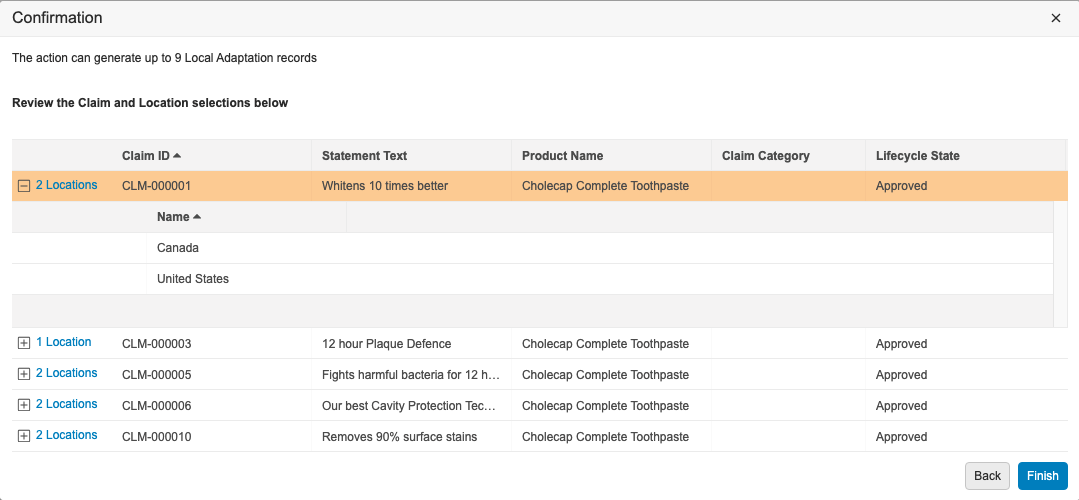
- Review your selections on the Confirmation page.
- Click on a Toggle Row Expanded () icon to expand that Claim’s section and view location details.
- When you are finished reviewing, click Finish.
After receiving a notification that the Local Adaptations are created, you can expand the Local Adaptations section of the Project’s details page to view the generated Local Adaptations.
Note: Generated Local Adaptations have a Created By value of “System”.
Bulk Creating All Local Adaptations
Vault generates one (1) Local Adaptation for each combination of Claim and Location, provided the combination of Claim and Location does not already exist as a Local Adaptation in your Vault.
Note: The generation process adheres to your permissions and lets you view and create only the records to which you have read and create access.
To create Local Adaptations from a Project:
- Navigate to the Project from which you want to generate Local Adaptations.
- Ensure you have added Claims to the Project.
- Expand the Locations section, and then click Add.
- Select the appropriate Locations, and then click OK.
- From the All Actions menu, select Bulk Create Local Adaptations (Project).
After receiving a notification that the Local Adaptations are created, expand the Local Adaptations section to view the generated Local Adaptations.
Note: If you don’t see the Bulk Create Local Adaptations (Project) option in the All Actions menu, the action may be part of an entry action. If available, select Change State from the Workflow Actions menu to change the Project record’s state and trigger the entry action.
Auto-Populating Statement Translations for Local Adaptations
After you have created Local Adaptations, you can automatically populate Statement translations for the Local Adaptations. See Working with Local Adaptations for more details.