When you open a document, the Doc Info page opens. This page includes these panels:
- Header Area: The header area above the document viewer and Doc Info pane allows you to navigate back using the breadcrumb trail as well as see the document’s current lifecycle state. The icons next to the document name can set the document as a favorite or display related notifications. If you are a task owner for an active workflow, you also see a task banner with information about the task. If the document uses a lifecycle configured with lifecycle stages and the document is not in a steady state, the Lifecycle Stages banner displays information on where the document is its lifecycle. In addition, this area shows the action bar with the All Actions menu and your four most frequently-used actions. If a user has checked out the document, a lock () icon is displayed next to the document name. If the document is under a legal hold, a gavel () icon is displayed next to the document name.
- Document Viewer: The document viewer displays viewable renditions on any device that supports HTML5 (iPad, Android tablets, etc.). The document viewer is to the left of the Doc Info pane. If a viewable rendition is available, it appears here. From the document viewer, you can review the document, add annotations, and click through embedded links.
- Doc Info Pane: The Doc Info pane to the right of the document viewer displays several panels with information about the document, including its fields, relationships, files, sharing settings, and document readiness, in individual tabs.
Note: The Lifecycle State Stage ID and Lifecycle Stage fields appear by default in the General section of the Information panel, even if lifecycle stages are not configured.
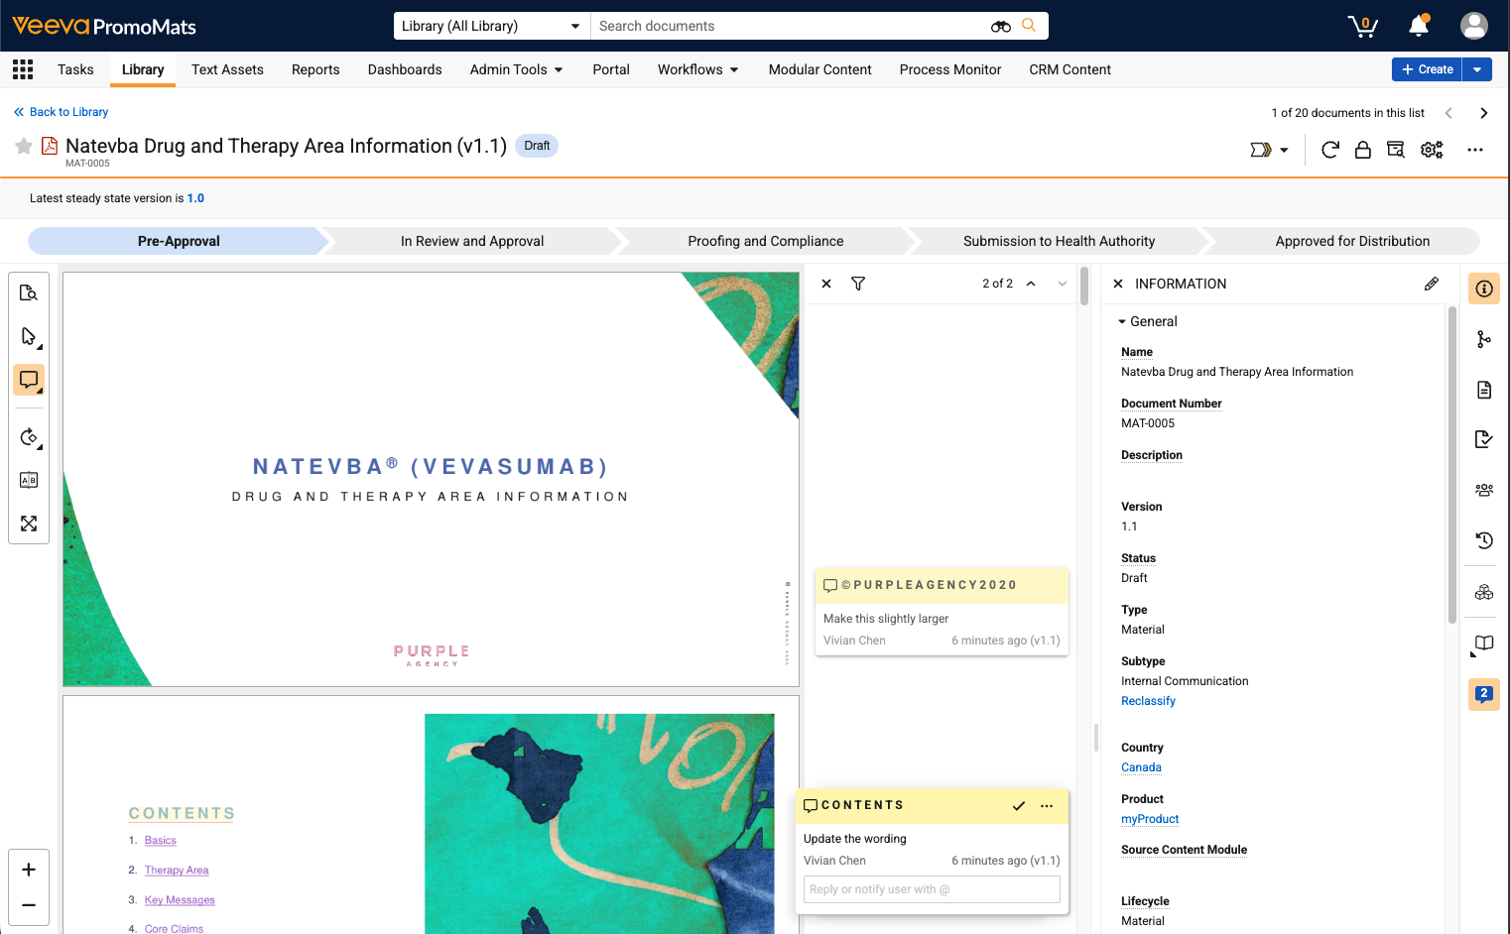
Lifecycle Stages Banner
The Lifecycle Stages banner helps you understand where a document is in its lifecycle by grouping specific lifecycle states into ordered collections of stages. The Lifecycle Stages banner provides a visualization for the document’s progress, with each chevron representing a single lifecycle stage. The chevrons are color-coded to indicate the document’s current stage:
- Green indicates a previous stage
- Blue indicates the active stage
- Grey indicates an upcoming stage
The Lifecycle Stages banner can also give details for active, incomplete tasks. Click the blue (in-progress) chevron to see a list of up to five open tasks. Additional information and actions display under the Lifecycle Stages banner with each task. Click View all tasks to open Timeline View and see all open tasks in the workflow. An exclamation point icon appears on the blue chevron if one or more tasks is behind schedule. The blue chevron also displays additional details on the active workflow, such as the workflow name, workflow owner, and start date and time.
Each chevron contains an Actions menu for the lifecycle state and each task. The Actions menu provides similar options to the workflow Timeline View, such as canceling workflows, replacing workflow owners, and reassigning tasks.
Inactive stages with no associated states are not displayed in the Lifecycle Stages banner.
Note: The Lifecycle Stages banner does not appear for documents in a steady state, for users with the Read-only User license type, or for users whose security profile does not grant the View User Information permission.
Doc Info Pane
You can switch between different panels in the Doc Info pane using the panel icons. Clicking the active panel icon collapses the Doc Info pane, allowing you to see more of the content in the document viewer.
- Information: Displays document information and fields
- Relationships: Displays document relationships, including linked and supporting documents
- Files: Displays related files, including source files, renditions, and attachments
- Document Readiness: Displays information about the document’s operational statuses related to rendition generation, searchability, and annotations; any warnings related to these operations; and document checks to aid users during document reviews
- Sharing Settings: Displays document sharing settings
- Timeline View: Opens Timeline View, including workflows and lifecycle state changes
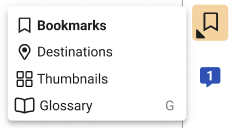
- Navigation Tools: Allows you to view the Bookmarks, Destinations, Thumbnails, and Glossary panels for the document. The navigation tools menu icon changes depending on the most recent panel selection.
You can click and drag the width of the Doc Info pane to resize it. Vault remembers the width and applies it the next time you view a document.
Admins can modify the document field layouts, display labels, and order of the fields on the Doc Info panels.
Navigation Tools Panel
The navigation tools panel allows you to view the document’s bookmarks, destinations, page thumbnails, and glossary. On the Doc Info pane toolbar, click the navigation tools button to open the menu, and select Bookmarks (), Destinations (), Thumbnails ( ), or Glossary () to open the appropriate panel. When you select a panel, that panel’s icon is displayed on the Doc Info pane toolbar for the menu.
Bookmarks
On the Doc Info pane toolbar, open the navigation tools menu and select Bookmarks () to open the Bookmarks panel. The Bookmarks panel allows you to view and navigate to bookmarks within the document. This panel is not available if the document does not have any defined bookmarks.
Destinations
On the Doc Info pane toolbar, open the navigation tools menu and select Destinations () to open the Destinations panel. The Destinations panel allows you to view and navigate to destinations within the document. This panel is not available if the document does not have any defined destinations.
Thumbnails
On the Doc Info pane toolbar, open the navigation tools menu and select Thumbnails () to open the Thumbnails panel. The Thumbnails panel displays thumbnail images for each page in the document. Click a page thumbnail to navigate to that page in the document.
Glossary
On the Doc Info pane toolbar, open the navigation tools menu and select Glossary () to open the Glossary panel. The Glossary panel allows you to search for glossary terms and displays matching glossary entries, if available. This panel is not displayed if it is not enabled by an Admin.
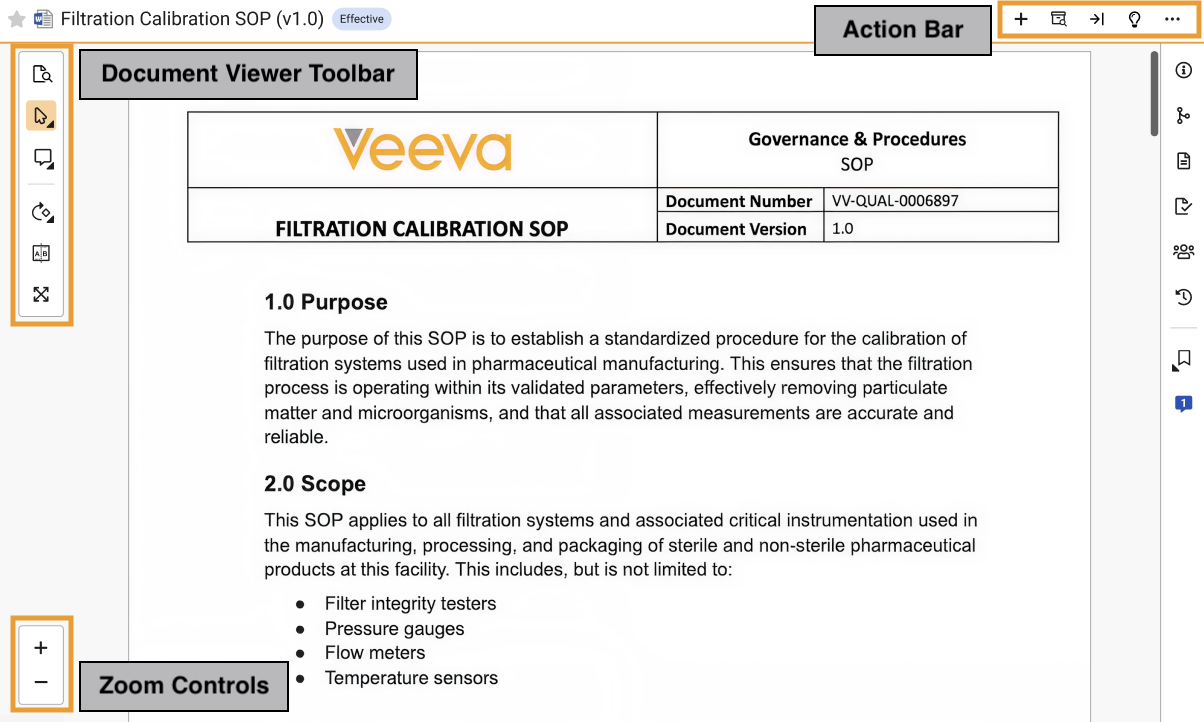
Document Viewer Toolbar
The document viewer includes many different tools that allow you to quickly access options for annotating, navigating, and viewing documents.
The available document viewer tools are displayed in several different locations in the document viewer:
- Document Viewer Toolbar: The document viewer toolbar is displayed in the upper-left corner of the document viewer and contains the following functionality:
- Find in Document () and page navigation
- Select () and Grab and Pan () modes
- Annotation tools
- Rotate (
 ) options
 - Compare Version (
 )
) - Fullscreen () mode
- Zoom Controls: Zoom controls are displayed in the lower-left corner of the document viewer and include the following functionality:
- Zoom In () and Zoom Out ()
- Zoom slider and zoom percentage
- Fit Height () and Fit Width ()
- Action Bar: The action bar is displayed in the upper-right corner of the document viewer and displays the All Actions menu and the user’s four most frequently-used actions.
See Vault Keyboard Shortcuts for information about navigating the document viewer tools with your keyboard.
Find in Document & Page Navigation
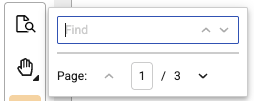
Click Find in document () on the document viewer toolbar to open the Find search box, which allows you to search the text of the document for a specific string. Vault highlights matches in one page at a time. Click Previous result () or Next result () to navigate to the previous or next matching result. Find reads periods as spaces. For example, the term 409.3 finds instances of 409 and 3.
To navigate to a specific page, enter the page number in the Page field and press Enter. Click Previous page () or Next page () to navigate to the previous or next page.
Select Mode & Grab and Pan Mode
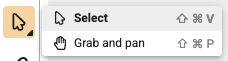
Open the select menu on the document viewer toolbar and select Select () or Grab and Pan (). Select mode allows you to highlight text in the document and right-click the document to view the context menu. Grab and Pan mode allows you to click and drag the document view. This tool is helpful when a document page is zoomed in and you need to pan to a different view of the page that you cannot locate by scrolling.
Annotate Mode & Annotation Tools
In Annotate mode, the annotations panel is displayed and you can add new annotations and modify existing annotations.
The View/Hide Annotations () button on the Doc Info pane toolbar displays the number of annotations on the document:  . If there are no annotations on the document, the Doc Info page opens in Select mode and the Show/Hide Annotations () button displays a plus sign (+) instead of a count of annotations.
Exit Annotate mode and hide the annotations panel by clicking Hide annotations (). Click View annotations () to enter Annotate mode and reopen the annotations panel.
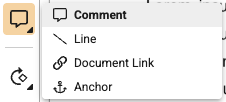
To add new annotations, open the annotation tools menu on the document viewer toolbar and select the annotation type you want to add: Comment (), Line (), Document Link (), Permalink Link () (when enabled), or Anchors (). Selecting an annotation tool opens the annotations panel and enters Annotate mode.
Additional annotation tools are displayed in the All Actions menu when applicable, such as Bring Forward Annotations, Show Links or Hide Links, and application-specific annotation tools. Additional application-specific annotation tools may also be displayed in the annotation tools menu on the document viewer toolbar.
When opening a document, whether the document opens in Annotate mode or Select mode is dependent on your user preferences and permissions. Additionally, if the document is bookmarked with Annotate mode hidden, the URL will always open the document in Select mode instead of Annotate mode.
Rotate Options
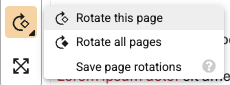
Click Rotate options ( ) on the document viewer toolbar to open the rotate options menu. Select Rotate this page () to rotate the current page clockwise 90 degrees. Select Rotate all pages (
 ) to rotate all pages clockwise 90 degrees.
To save the rotation, select Save page rotations from the rotate options menu. This option applies the current rotation for the document in all document viewers and future downloaded or exported renditions. You cannot save page rotations on CrossLinks, but saved rotations on the source document are applied to the CrossLink. Vault preserves saved rotations in re-rendered documents.
You must have a document role that grants the Manage Viewable Renditions permission or have a security profile that grants the Vault Owner Actions: Re-render permission to save rotations.
Compare Version
Click Compare Version () to compare the document version you are currently viewing with the previous major version.
Full Screen
To view the document in full screen, click Full screen () on the document viewer toolbar. To close full screen, click Exit full screen () on the document viewer toolbar. The All Actions menu and actions on the action bar are unavailable in full screen mode.
Zoom Controls
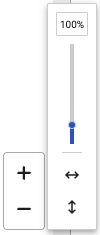
All documents default to a zoom value of 100%. Click Zoom in () to zoom in, and click Zoom out () to zoom out. Clicking either of these zoom buttons opens additional zoom controls. Click and drag the zoom slider to zoom in and out in 25% increments. Click Fit width () to fit the width of the document’s current page to the document viewer width. Click Fit height () to fit the height of the document’s current page to the document viewer height.
When zoomed in further than the page width, scroll to the bottom of the document to display the horizontal scroll bar. You can use Grab and Pan mode to view content outside of the document viewer’s current zoom level.
Document Tool User Preferences
When you select the Select () tool, Grab and Pan () tool, or any annotation tool, Vault saves that selection as a user preference. The user preference is saved for the most recently selected tool and is applied across documents, sessions, and browsers. It determines which tool is selected when you access a document, but is also dependent on your permissions.
As an example, you have Annotate permission on a document and your saved user preference is the Comment annotation tool. When you open another document for which you have Annotate permission, the document opens in Annotate mode with the Comment tool active. However, if you open another document for which you do not have Annotate permission, the document opens in Select mode with the Select tool active.
If your saved user preference is the Select tool, documents for which you have Annotate permission are opened in Annotate mode with the Select tool active, even if the document does not have annotations.
Split Screen Mode
The document viewer allows you to view two different documents side-by-side using Split Screen mode.

When viewing two documents in Split Screen mode, you can perform any available action on the primary document (the left document in Split Screen mode), but you can only access Find in Document, the Select tool, the Grab and Pan tool, and zoom controls on the secondary document (the right document in Split Screen mode). In addition, breadcrumb navigation and document list traversal are not available in Split Screen mode.
While viewing documents in Split Screen mode, if you open another document in Split Screen mode, the current secondary document closes and the new document becomes the secondary document.
To use Split Screen mode:
- Open a document in the document viewer. This becomes the primary document once you open a second document in Split Screen mode.
- Click View in split screen () in any of the following locations to open the secondary document in Split Screen mode:
- The suggested documents list when searching for a document in the Search box above the primary document in the document viewer. This opens the document you searched for as the secondary document.
- The Linked Documents section of the Relationships panel on the Doc Info pane of the primary document. This opens the linked document as the secondary document.
- The Attachments section of the Document Files panel on the Doc Info pane of the primary document. This opens the attachment document as the secondary document.
- The Version History dialog for the primary document. This opens the document version as the secondary document.
- Optional: Click View Document in Mini-Browser () in the heading above either document to remove that document from Split Screen mode and open it in a separate pop-up mini-browser window. Once you open a document in the mini-browser, you cannot move it back into Split Screen mode, and the remaining document becomes the primary document.
- Optional: Adjust the width of the primary and secondary split screen views by clicking and dragging the divider between the views.
- To exit Split Screen mode, click Split Screen () above the secondary document and select Close Primary (
 ) or Close Secondary (
 ) to close either of the documents. Vault exits Split Screen mode and the document that remains open becomes the primary document with all available document viewer tools.
Copying Document Text
To copy text from a document in Select mode or Annotate mode, hold down the C key and select the text with your cursor, then release the C key and mouse button to copy. You can also copy text using the document viewer context menu. You can copy text from any document where text is selectable.
By default, you must have the View Content permission on a document to copy text. Admins can configure Vault to require additional permissions when copying text.
Copying Document Text Limitations
The following limitations apply to copying text:
- Vault supports whole word selection only. You cannot copy part of a word.
- You cannot copy text on mobile devices.
- Read Only and Anonymous (token-based) users cannot copy text from documents.
- You cannot copy more than 500 words at a time.
Checkout Lock Icon
When a document is checked out, you can hover over the checkout lock icon () to see who checked the document out, when it was checked out, and whether it was checked out using Vault File Manager or a standard Vault checkout.
Download Button
The Download button has two options:
- Click Source File () to download the source document file.
- Click the Download Options () menu to the right of the Source File icon to see a list of all available files and renditions to download.
The Source File and Download Options buttons are located on the action bar by default, but Vault replaces them with another action if you do not use it often. You can also download source files and rendition files from the Files panel in the Doc Info pane or from the All Actions menu.
Document Viewer Context Menu
While viewing a document in Select or Annotate mode, you can right-click on the document or on selected text or area to open the context menu. You can select several actions from the context menu, such as Copy Text, Search Glossary, Create Comment, and more. Available actions depend on your permissions.
Demo: Document Viewer Context Menu
This video demonstrates how to use the document viewer context menu.
Limitations
The following limitations apply to the document viewer context menu:
- The context menu closes if you scroll or resize a page, zoom in or out, or navigate between pages of the document.
- The context menu is unavailable for anonymous (token-based) and read-only users and in Vault Mobile.
- You cannot create line annotations using the context menu.