Veeva Claims provides Brand Managers the ability to initiate a project and group claims pertaining to a particular initiative in this project so that as a key R&D, regulatory, or legal stakeholder, you can track and work on the related claims as a group. From a project, users can generate multiple Claim records and multiple local adaptations. Before finalizing a project, you can review and remove any irrelevant statements, claims, and local adaptations.
Brand Managers in the consumer goods industry typically work on initiatives such as new product development, product line extensions, or packaging refresh initiatives. Proposing, substantiating, reviewing and approving product marketing claims is a sub-activity of these initiatives.
Project Management includes the Project Manager application role, who can be assigned to a project, and who receives email and Vault notifications about project assignment and reassignment.
Depending on your Admin’s configuration, object, field, and section labels may appear differently than the labels mentioned in this article.
Viewing Projects
You can access a list of all Projects under the Projects tab. To view an individual project’s detail page, click on its Name. To view all claims in a Project, expand the Claims section.
Searching and Filtering
You can search for projects from the Projects tab using the search bar. The Projects tab shows all projects by default. You can add filters or create custom views to limit the types of projects shown.
Creating a Project
Projects are managed as object records within Vault. You can create a new Project record or you can clone an existing Project record.
Creating a New Project
To create a new Project:
- From the Projects tab, click Create.
- Enter a Name.
- Optional: In the drop-down, select a Project Type.
- Optional: Specify a Project Manager. This is the person who will manage the Project.
- Optional: Enter a Project Description.
- Optional: Select a Due Date.
- Click Save, or to create another Project, click Save + Create.
You can also create a new Project by copying an existing Project record. Project records copied from another Project include a read-only, non-editable field called Copied From Project. This field identifies the record from which the new Project was generated.
Cloning an Existing Project
You can clone a Project using the Clone Project action. This action allows you to dynamically deep copy (or “clone”) an existing Project and selectively copy the related records from the existing Project you want to reference in the new Project. When you clone a Project record, Vault does the following:
- Copies the Project record and includes “Copy of [Project Name of cloned record]” in the Project Name of the new record.
- Creates new join records for the specified records you select such as Claims, Local Adaptations, Locations, Products, and Statements.
- Excludes any child records related to the existing Project, such as Project Comments.
- Depending on your Admin’s configuration, Vault may not display records in particular lifecycle states.
- When configured by your Admin, some dependent records are automatically selected based on your selections. When records are automatically selected, you will see a Record(s) automatically selected () icon in the applicable section header. You cannot unselect any automatically selected records without unselecting the record with dependencies.
- Selecting a Claim may automatically select the dependent Statement and Product.
- Selecting a Local Adaptation may automatically select the dependent Claim and Location.
Project records cloned from another Project include a read-only, non-editable field called Copied From Project. This field identifies the record from which the new Project was generated.
Note: The cloning process adheres to your permissions and lets you view and copy only the records to which you have read and edit access.
How to Clone Projects
To clone an existing Project and selectively copy related records:
- Navigate to the appropriate Project record.
- From the All Actions menu, click Clone Project.
- Select the sections (groups of records) you want to clone to the new Project. Depending on your Admin’s configuration, some sections may be auto-selected after you select the Claim or Local Adaptation sections.
- Click Clone Project.
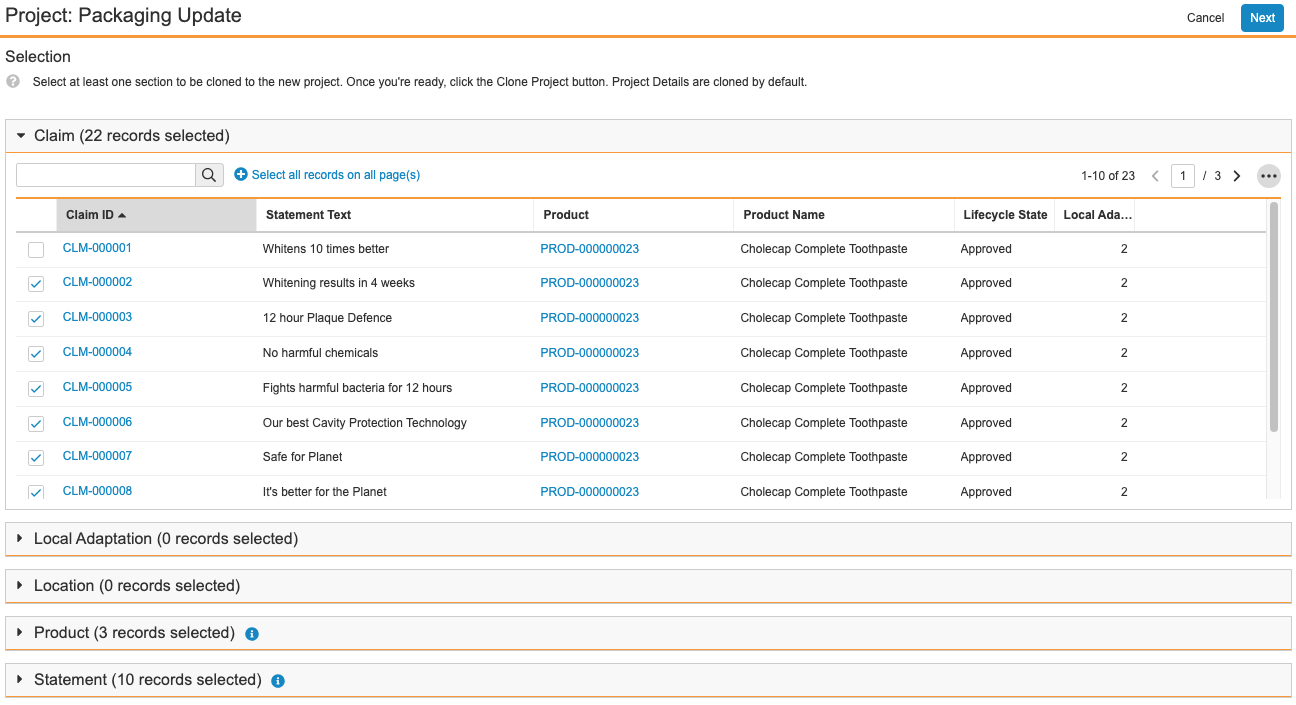
- Review the groups of records available to copy to the new Project.
- Click a section header to expand or collapse it.
- Customize the displayed columns to include fields you have permission to view.
- Use the search bar to help find the records you want to add.
- Select the records you want to add.
- Click the plus () and minus () icons to select and unselect all records on all of that section’s pages.
- If configured by your Admin, some records are automatically selected based on your selections. Open the sections with the Record(s) automatically selected () icon to review the automatically-selected records.
- Click Next.
- On the Confirmation page, review your selected Claims to copy into the new Project.
- Click Finish.
As a best practice, ensure you modify the Project Name of the new Project record after cloning. To do this:
- When notified, navigate to the newly-created Project record.
- Click Edit.
- Modify the Project Name of the new record.
- Click Save.
Creating a Project Team
You can create a team for each Project. To do this, add the applicable Users to the Project Team section of a Project record.
Populating a Project with Claims
After you’ve created a Project, you can populate the Project with Claims. See Populating a Project with Claims for more details.
Creating Local Adaptations from a Project
After you’ve created a Project, you can create Local Adaptations from a Project. See Creating Local Adaptations from a Project for more details.
Using the Project Hierarchy Viewer
If configured by your Admin, you can use the Project Hierarchy Viewer on Project records. The viewer allows you to visualize and interact with a Project’s hierarchy so that you can review all related records within the context of a Project to make an informed assessment.
See Using the Project Hierarchy Viewer for more details.
Adding & Replying to Comments
When configured by your Admin, you can add comments to Project records. If configured, you can also reply to comments in comment threads for certain object records. See Using Comments for more details.
Removing Statements & Related Records from a Project
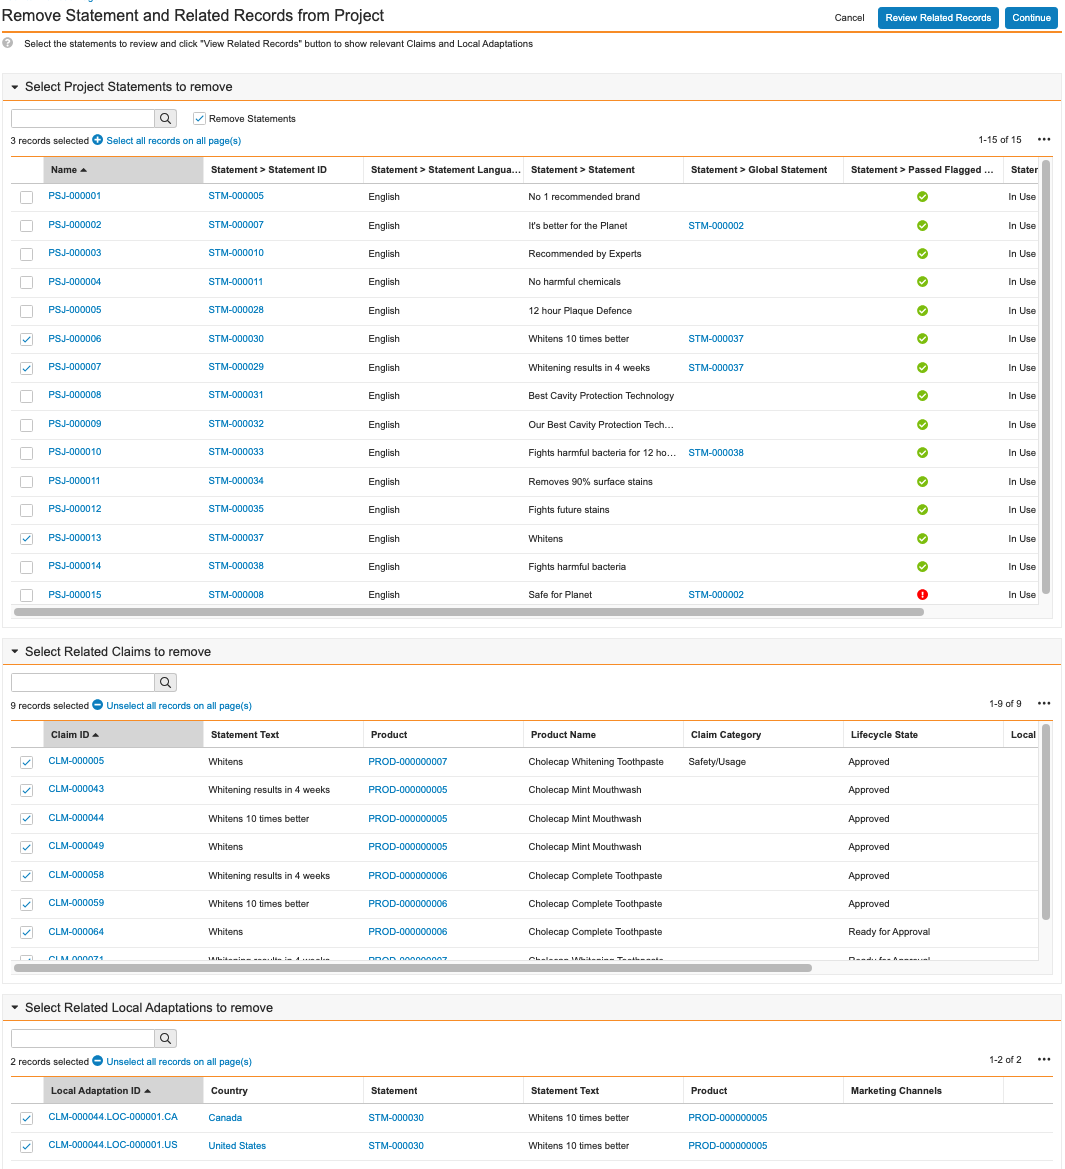
You can remove Statements, Claims, and Local Adaptations from a Project with the Remove Statement and Related Records from Project action, allowing you to quickly clean up a project before finalizing it. When you run the action on a Project record, Vault displays all related Statements, Claims, and Local Adaptations in separate grid sections on the Remove Statement and Related Records from Project page. In each section, you can click Select all records on all page(s) and Unselect all records on all page(s) to quickly select and unselect all records in that section.
When removing specific Statements, you have the opportunity to select specific related Claims and Local Adaptations to remove as well. Alternatively, you can keep the Statements but remove only selected Claims and Local Adaptations from a project.
How to Remove Statements, Claims, & Local Adaptations
To remove Statements, Claims, and Local Adaptations from a Project:
- Navigate to the applicable Project record.
- From the All Actions menu, select Remove Statement and Related Records from Project. Depending on your Admin’s configuration, this action may only be available when the Project is in specific lifecycle states.
- On the Remove Statement and Related Records from Project page, review the Statements related to this project in the Select Project Statements to remove section. In each section on this page, you can use the search bar to filter the list of related records.
- In the Select Project Statements to remove section, select the Project Statements you want to remove.
- Optional: Select the Remove Statements checkbox to remove all Project Statements you select or clear the checkbox to keep the Project Statements and remove only the Claims and Local Adaptations you select.
- Click Review Related Records to see all Claims and Local Adaptations related to the Project Statements you selected.
- Optional: Expand the Select Project Statements to remove section to review your selections and make any necessary changes. If you change your initial selections, Vault hides the related record sections and you must click Review Related Records again to view the related record sections.
- Optional: In the Select Related Claims to remove section, select Claims to remove from this Project.
- Optional: In the Select Related Local Adaptations to remove section, select Local Adaptations to remove from this Project.
- When you’ve selected all related records to remove from the Project, click Continue.
When Vault finishes removing the Statements, Claims, and Local Adaptations you selected, you’ll receive an email and a Vault notification. The notification lets you know if removal was successful or if it failed and includes details about which records Vault removed.
Limitations
Each section displays up to 500 records. If there are more than 500 records, Vault does not list any records in that section and instead displays a message stating that there are too many items.
Project Lifecycle
Projects use the Project object lifecycle and include the following standard states:
- New: The initial state of the Project.
- In Progress: Claims within the Project are in various stages of approval.
- Completed: All Claims within the Project are approved.
Your Admin may add other custom states to suit your organization’s needs.