Veeva Claims provides you with the Project Hierarchy Viewer, which allows you to visualize a Project and its hierarchical structure of Claims and Local Adaptations so that you can review all related records in context and make an informed assessment.
Depending on your Admin’s configuration, object, field, and section labels may appear differently than the labels mentioned in this article.
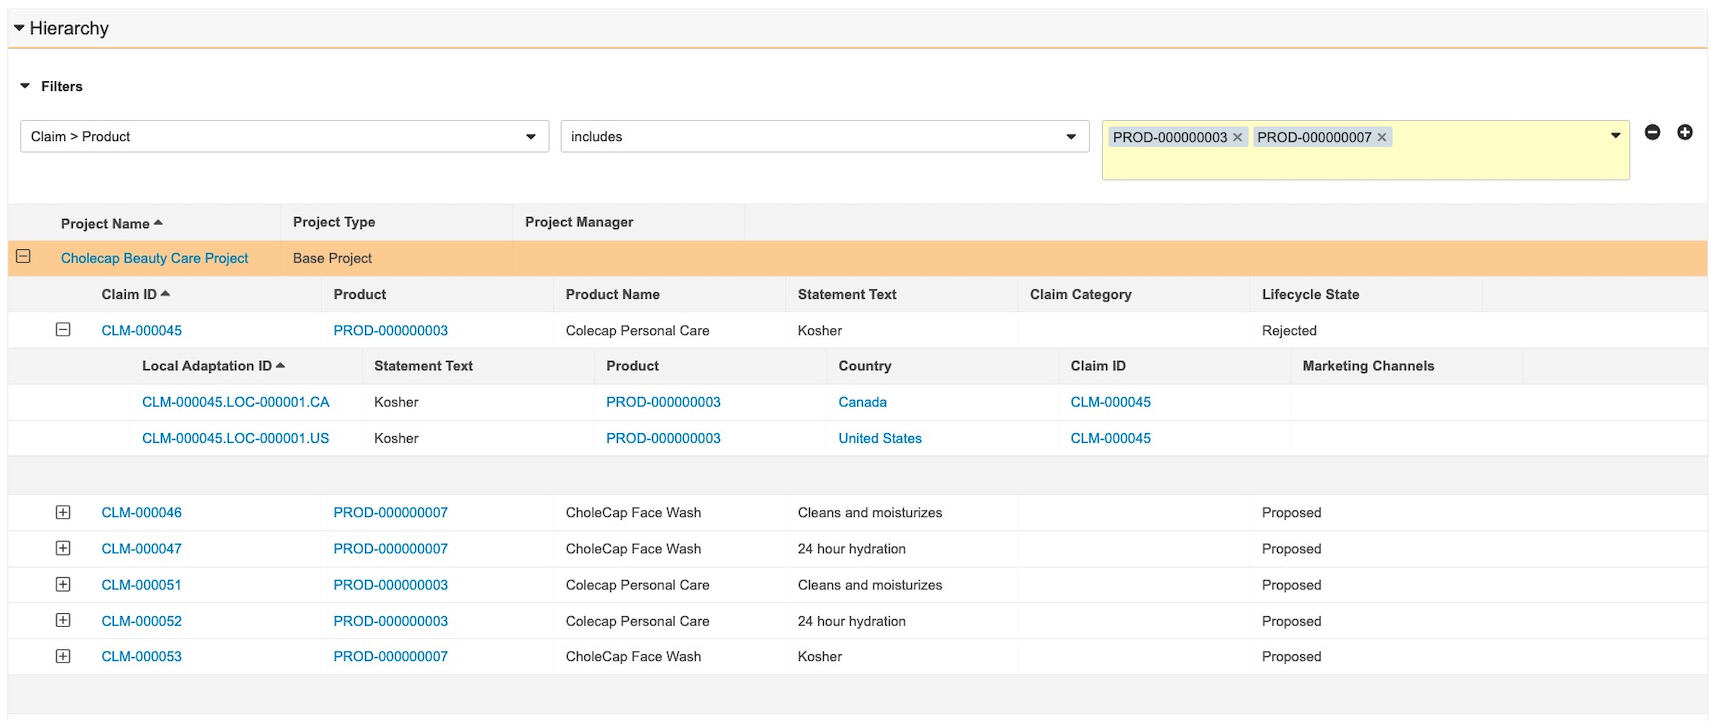
Accessing the Project Hierarchy Viewer
You can access the Project Hierarchy Viewer from a Project to review all Claims and Local Adaptations in the Project.
If a Claim or a Local Adaptation belongs to only a single Project, you may be able to see and interact with the viewer by accessing the Claim or Local Adaptation outside of the context of the Project; however, if the Claim or Local Adaptation belongs to more than one (1) Project, you must access the viewer from the context of the appropriate Project to see and interact with the project hierarchy.
Viewing & Navigating a Project Hierarchy
To use the Project Hierarchy Viewer, navigate to the appropriate Project to see all Claims and Local Adaptations in the project and the relationships between each record.
The viewer has the following conventions and behavior:
- The currently-selected row is highlighted in orange.
- If there are no Claims or Local Adaptations in the Project, the section displays a message to you.
- If a hierarchy contains more than 500 Claims or more than 1,000 Local Adaptations, the hierarchy does not display any records and instead displays a message to you. Contact your Admin for more details.
- If you do not have permissions to a record, object, or field, the row or column may not be visible to you. Contact your Admin for more information.
You can interact with the viewer in the following ways:
- Click the plus () and minus () icons to expand and collapse sections within the hierarchy.
- Click a record’s ID to navigate to that record while maintaining your place in the hierarchy. For example, from a Project, you can click the ID of a Claim to navigate to that Claim’s detail page and continue to navigate through the hierarchy from the Claim.
- Add and remove filters from the Project’s detail page. The filters you apply persist to the Claim and Local Adaptation record pages in the viewer section when you navigate through the hierarchy. You can’t add and remove filters from the Claim and Local Adaptation record pages.
Using Filters
You can add filters to adjust the scope of the project’s related records that appear in the viewer. You can filter on any Project, Claim, or Local Adaptation object fields configured as column headers by your Admin.
To add filters:
- In the Filter section, select a field from the drop-down.
- Choose an operator and field value, if needed. The values here depend on the field you select for the Filter.
- Add up to a total of three (3) filters by clicking the plus (+) icon. You can remove a filter by clicking the minus (-) icon.